
Using Sun Simulation Videos to Choose the Right Window Glass - LOW-E, Thermal Break, and Tinting Decisions


Using Sun Simulation Videos to Choose the Right Window Glass - LOW-E, Thermal Break, and Tinting Decisions
Your architect hands you a 3D sun simulation video showing shadows dancing across your future home throughout the day and seasons. It looks impressive, but how do you actually use this data to make smart decisions about LOW-E coatings, thermal breaks, and glass tinting? Most homeowners get these expensive simulations, nod appreciatively, then still guess on window specifications.
Bottom line upfront: Sun simulation videos reveal the precise solar gain patterns that determine which windows need premium LOW-E coatings, where thermal breaks matter most, and whether tinting is worth the cost. Used correctly, these simulations can save you ₱100,000-300,000 in unnecessary upgrades while ensuring comfort where it matters.
Here’s how to translate pretty animations into practical window specifications that work.
The Sun Study Video: Your Data-Rich Design Tool
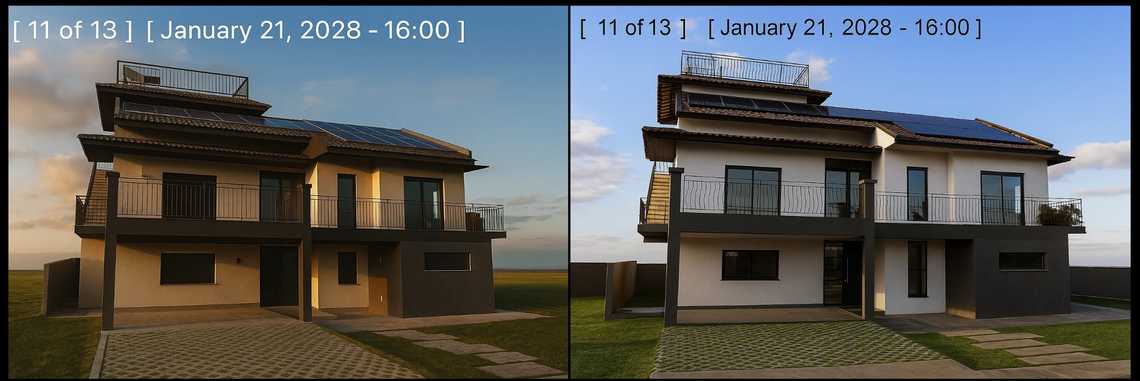
3D sun simulation showing seasonal shadow patterns and solar exposure analysis throughout different times of day and year
The video above demonstrates a comprehensive sun study analysis showing:
- Front and back elevations with seasonal sun position changes
- Summer vs winter sun angles affecting different window orientations
- Daily shadow progression from sunrise to sunset
- Thermal load visualization indicating peak solar gain periods
Your architect’s simulation captures four key seasonal scenarios: front view summer sun, back view summer sun, front view winter sun, and back view winter sun. Each scenario reveals critical data for window specification decisions.
What Your Sun Simulation Actually Shows
Your architect’s 3D model tracks the sun’s path across your building envelope, showing exact shadow patterns, direct solar exposure, and thermal loads on each surface. But the key insights aren’t obvious from just watching the video.
Critical data points in the simulation:
- Direct solar exposure hours per window orientation
- Seasonal variation in sun angles and intensity
- Shadow protection from overhangs, neighboring buildings, landscaping
- Thermal load timing - when each window receives maximum heat gain
- Glare patterns throughout different times of day
What the video reveals that specifications must address:
- West-facing windows getting hammered by afternoon sun (need maximum LOW-E protection)
- North windows with minimal direct exposure (standard glass acceptable)
- East windows with morning sun but afternoon shade (moderate LOW-E sufficient)
- South windows with seasonal variation (thermal break critical for year-round comfort)
The simulation shows you where to invest in premium glass technologies and where standard specifications work fine.
Decoding Solar Exposure Patterns for Glass Selection
High Solar Gain Windows → Maximum Protection Required
Identification markers in the video:
- Direct sunlight for 6+ hours daily
- Bright white/yellow coloring in sun path analysis
- Minimal shadow protection from overhangs
- West and southwest orientations in tropical climates
Required specifications:
- LOW-E coating: Mandatory, preferably double LOW-E
- Glass configuration: Triple glazing with wide spacer (19A minimum)
- Thermal break: Essential for preventing heat transfer
- Tinting consideration: Light tinting for glare control without blocking views
Example from simulation: West-facing living room windows showing direct exposure from 1 PM to sunset need maximum protection to prevent overheating and furniture fading.
Moderate Solar Gain Windows → Balanced Approach
Identification markers:
- 3-6 hours direct sunlight with some shade periods
- Mixed shadow patterns throughout the day
- East and southeast orientations typically
- Some overhang protection visible
Optimized specifications:
- LOW-E coating: Standard single LOW-E adequate
- Glass configuration: Double glazing with 12A spacer acceptable
- Thermal break: Recommended for year-round comfort
- Tinting: Usually unnecessary, save the cost
Low Solar Gain Windows → Standard Specifications Sufficient
Identification markers:
- Mostly shaded throughout the day
- North-facing orientations
- Significant overhang or building protection
- Cool colors in thermal analysis
Cost-effective specifications:
- LOW-E coating: Optional, consider for consistency
- Glass configuration: Standard double glazing
- Thermal break: Nice to have but not critical
- Tinting: Not needed, focus budget elsewhere
Seasonal Analysis: Summer vs Winter Implications
Summer Pattern Analysis (April-October Philippines)
High sun angle characteristics:
- Overhangs provide better protection
- East/west windows receive most direct exposure
- North windows stay relatively protected
- South windows get some direct morning/afternoon sun
Window specification priorities:
- West windows: Maximum LOW-E protection essential
- East windows: Moderate LOW-E for morning comfort
- South windows: Thermal break prevents afternoon heat buildup
- North windows: Standard specifications usually adequate
Winter Pattern Analysis (November-March Philippines)
Lower sun angle characteristics:
- Reduced overhang effectiveness
- South windows receive more direct exposure
- East/west patterns remain significant
- Longer shadow periods on north elevations
Specification adjustments needed:
- South windows: Upgrade LOW-E for additional winter sun
- East/west: Maintain high protection levels
- North windows: Standard specifications still work
Year-Round Decision Framework
Consistent high exposure (both seasons): Premium specifications mandatory Seasonal variation: Balance protection with cost-effectiveness Consistently protected: Save money with standard specifications
Thermal Break Analysis: When It Actually Matters
Your simulation shows not just solar gain but thermal bridging potential through window frames. This data determines where thermal breaks provide real value versus unnecessary cost.
High Thermal Load Conditions → Thermal Break Essential
Simulation indicators:
- Frame temperatures exceeding glass temperatures
- Continuous direct exposure for 4+ hours
- Air conditioning zones requiring consistent temperatures
- Humid climate condensation risk areas
Thermal break specifications:
- Material: Polyamide strips minimum 14mm width
- Application: All frame members, not just horizontal
- Quality: Verify with thermal imaging if possible
- Integration: Must work with chosen LOW-E system
Moderate Thermal Conditions → Cost-Benefit Analysis
Consider thermal breaks when:
- Frames show moderate temperature elevation
- Comfort sensitive areas (bedrooms, offices)
- Future AC installation planned
- Premium aesthetic requirements
Low Thermal Impact → Standard Frames Acceptable
Skip thermal breaks when:
- Minimal frame heating visible in simulation
- Natural ventilation primary cooling strategy
- Budget constraints require prioritization
- Consistent shade protection throughout day
LOW-E Coating Selection Based on Simulation Data
Double LOW-E for Maximum Protection
Required when simulation shows:
- Direct exposure exceeding 6 hours daily
- High thermal loads on multiple orientations
- Critical spaces requiring temperature control
- Furniture/flooring protection needs
Specifications:
- Position: Surface 2 and surface 5 (in triple glazing)
- Type: Silver-based for maximum performance
- Light transmission: 70%+ for adequate daylighting
- Solar heat gain coefficient: 0.30 or lower
Single LOW-E for Balanced Performance
Appropriate when simulation indicates:
- Moderate exposure with some protection
- Standard comfort requirements
- Good overhang design reducing peak loads
- Cost-effectiveness priority
Specifications:
- Position: Surface 3 (inner pane of double glazing)
- Performance: SHGC 0.40-0.60 range
- Light transmission: 75-80% typical
- Cost savings: 30-40% versus double LOW-E
Standard Glass for Protected Areas
Acceptable when simulation confirms:
- Consistent shade throughout day
- Minimal thermal loading
- Non-critical spaces (storage, mechanical)
- Maximum budget efficiency needed
Tinting Decisions: Glare vs Views vs Cost
When Tinting Makes Sense
Simulation-based indicators:
- Bright glare periods visible in analysis
- Direct sun on computer/TV viewing areas
- Consistent high exposure despite LOW-E protection
- Privacy requirements for ground floor windows
Tinting specifications:
- Light tinting: 15-25% reduction for glare control
- Neutral colors: Avoid blue/green tints that distort views
- Quality grades: Ceramic tints for durability
- Integration: Works with LOW-E coatings
When to Skip Tinting
Avoid tinting when:
- Good overhang protection shown in simulation
- LOW-E coating handles thermal loads adequately
- Natural lighting important for space function
- Views are primary window purpose
Practical Application: Room-by-Room Analysis
Living Areas (High Priority)
Use simulation to identify:
- Peak exposure times for seating areas
- Glare patterns on TV/computer locations
- Furniture placement relative to sun patterns
- Thermal comfort requirements
Specification strategy:
- Premium LOW-E where family spends most time
- Thermal breaks for consistent comfort
- Light tinting only if glare analysis confirms need
Bedrooms (Comfort Focused)
Simulation analysis for:
- Morning sun wake-up patterns
- Afternoon overheating potential
- Privacy requirements
- Sleep quality impacts
Balancing approach:
- Moderate LOW-E for comfort without over-darkening
- Thermal breaks if AC planned
- Consider blackout treatments vs tinting
Kitchen/Dining (Heat Management)
Critical simulation data:
- Cooking area thermal loads
- Morning breakfast lighting
- Evening dining ambiance
- Food storage area temperature control
Specification priorities:
- Focus on actual cooking area exposure
- Standard glass for dining if protected
- Thermal breaks where combining with cooking heat
Service Areas (Cost Optimization)
Simulation shows:
- Utility room exposure patterns
- Storage area thermal requirements
- Stairwell lighting needs
- Bathroom privacy/ventilation integration
Budget approach:
- Standard specifications unless extreme exposure
- Focus premium upgrades on occupied spaces
Common Mistakes in Simulation Analysis
Over-Engineering Based on Peak Conditions
Problem: Specifying maximum protection for brief peak exposures Solution: Analyze typical daily patterns, not worst-case scenarios Cost impact: Unnecessary premium upgrades costing ₱50,000-150,000
Ignoring Microclimate Factors
Problem: Not accounting for landscaping, neighboring buildings, local weather Solution: Verify simulation assumptions against site conditions Reality check: Existing trees, future construction, seasonal vegetation
Uniform Specifications Across All Windows
Problem: Using same glass specifications for all orientations Solution: Customize based on each window’s specific exposure pattern Savings opportunity: Standard glass for protected windows saves 30-40%
Forgetting Future Changes
Problem: Not considering landscape maturity, adjacent development Solution: Plan for 10-20 year evolution of site conditions Example: Shade trees growing, neighboring construction blocking views
Cost-Effectiveness Framework
High-Impact Investments (Best ROI)
- LOW-E on west-facing windows: Immediate comfort improvement
- Thermal breaks in AC zones: Energy savings plus comfort
- Premium glass in living areas: Daily quality of life impact
Medium-Impact Investments (Consider Carefully)
- Uniform LOW-E throughout: Aesthetic consistency vs cost
- Tinting for glare control: Comfort vs view quality trade-off
- Triple glazing upgrades: Performance vs budget limitations
Low-Impact Investments (Usually Skip)
- Premium glass on protected windows: Minimal benefit
- Tinting without glare issues: Unnecessary view restriction
- Thermal breaks in naturally ventilated areas: Limited value
Integration with Philippine Climate Considerations
Humidity Management
Simulation insight: Windows with thermal bridging risk condensation Solution: Thermal breaks prevent frame cooling below dew point Critical areas: Air-conditioned spaces with high outdoor humidity
Typhoon Season Preparation
Simulation shows: Solar loads during typhoon season (different angles) Specification impact: Thermal performance during extended indoor periods Backup considerations: Generator-powered AC efficiency with better glass
Monsoon Considerations
Wet season patterns: Reduced solar gain, increased humidity challenges Dry season impacts: Maximum solar exposure, critical glass performance Year-round balance: Specifications must work in both extremes
The Implementation Strategy
Phase 1: Simulation Analysis (Week 1)
- Review video with architect for orientation-specific exposure data
- Identify high/medium/low solar gain windows
- Note seasonal variations and thermal bridge risks
- Document glare patterns for major living spaces
Phase 2: Specification Development (Week 2)
- Match window technologies to exposure levels
- Prepare budget for different specification tiers
- Get quotes for standard vs premium options
- Verify supplier availability for chosen specifications
Phase 3: Optimization and Purchasing (Week 3-4)
- Balance performance needs with budget constraints
- Prioritize upgrades for highest-impact windows
- Coordinate with contractor for proper installation
- Schedule delivery to match construction timeline
Real-World Validation
Post-installation monitoring:
- Compare actual performance to simulation predictions
- Document comfort levels throughout different seasons
- Measure energy consumption patterns
- Note any unexpected glare or thermal issues
Typical accuracy: Well-calibrated simulations predict reality within 10-15% Common discrepancies: Landscaping changes, actual vs specified glass installation Optimization opportunities: Learn for future projects or additions
The Bottom Line
Sun simulation videos provide the precise data needed to optimize window specifications, but only if you know how to interpret the results. Focus premium upgrades on windows with genuine high solar loads while using standard specifications for protected areas.
The smart approach:
- Analyze exposure patterns by orientation and season
- Prioritize specifications based on actual thermal loads
- Balance performance with budget using simulation data
- Customize by room function and comfort requirements
Typical savings from simulation-based optimization: ₱100,000-300,000 versus uniform premium specifications across all windows, while achieving better actual performance through targeted upgrades.
Your simulation video isn’t just a pretty marketing tool, it’s a precise engineering analysis that can guide smart investment decisions. Use it to put premium glass technologies exactly where they provide maximum benefit, and standard specifications where they’re adequate.
The result: optimal comfort, energy efficiency, and cost-effectiveness based on your specific building’s solar exposure patterns rather than generic recommendations.


Related Posts
Quick Links
Legal Stuff